Have you ever seen moving pictures online and wondered how they are made?
Here’s how to make a basic GIF picture with Camtasia Studio.
What is Camtasia Studio?
Camtasia Studio is an advanced screen video recorder from TechSmith which has edit, produce, and many more options to enhance your video, all in one program. One of the producing options in this program is GIF for a recorded video, which we will be learning about.
How to start
Well first of all, download Camtasia Studio 7. After you open Camtasia Studio, getting to know your interface would be helpful in the long road, but it’s not necessary.

Recording your video
Notice when you first open the program, a window pops up showing 4 options, one being “Record the Screen.” I have illustrated it here:

Or you can click on “Record the Screen” in the task list of the interface.

The next step is self-explanatory, you choose the area you want to record or you choose the whole screen, depends on what you want, then start recording after the 3-second countdown. Stop by pushing F10 or the “Stop” button
Producing it into a GIF animation
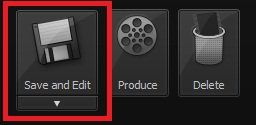
After you finish recording your video, a preview appears and in the corner there are 3 options:
Save and Edit, Delete, and Produce.
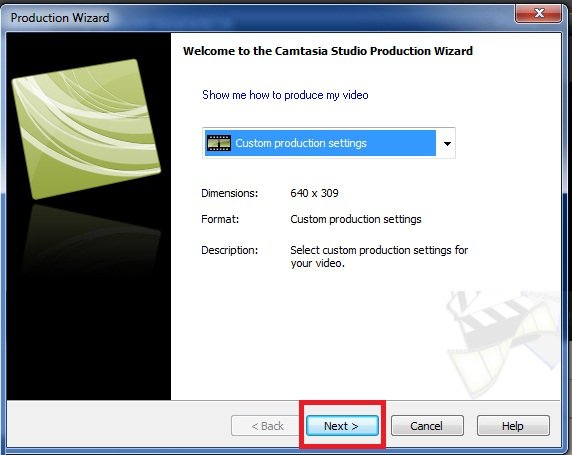
Click on Produce, save your video, and choose “Custom Production Settings” from the drop-down list and click “Next”.
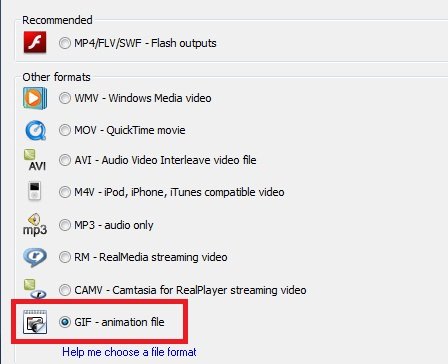
Then comes the Output format screen, which has lots of formats, GIF being one of them, choose it:
Then click Next on all the following screens, as they are not necessary. You may edit some forms for modified animations but I won”t go there. (On the last form is the name of the video so you should change that.) After clicking Finish on the last screen, it will start converting.
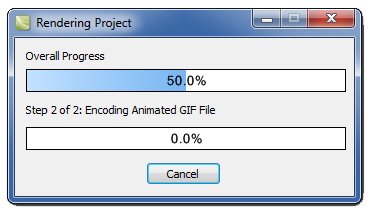 Now this will take some time depending on the length of the video (40 seconds is more than enough). Lagging occurs when the video exceeds 35-40 seconds.
And you are done! Your video is now gonna play in picture format, so you can send it to your cell-phone, upload it to your website in the format of a picture!