Gmail is a go-to email service for most people. Also, many of us punch in our address in random places that call for spam and useless messages. In the bulk of unread messages, the important ones take a backseat. Therefore, we find ourselves in need of searching for those crucial messages. Sometimes, there is also a need to retrieve old messages to forward them accordingly.
In that case, an auto filter comes in handy. If you have been using Gmail for a long time, you will have thousands of messages. Going through every email is a hectic affair. Hence, we need relevant keywords in our custom filters to pull out exactly what we need without wasting much time. Here is how you can automatically filter Gmail messages.
Contents
Steps to create a filter
Auto-filtration requires you to provide relevant keywords so it can perform the search accordingly. Here are steps to create a Gmail filter:

- Open the Gmail app or website.
- In the search bar at the top, click on the dropdown arrow.
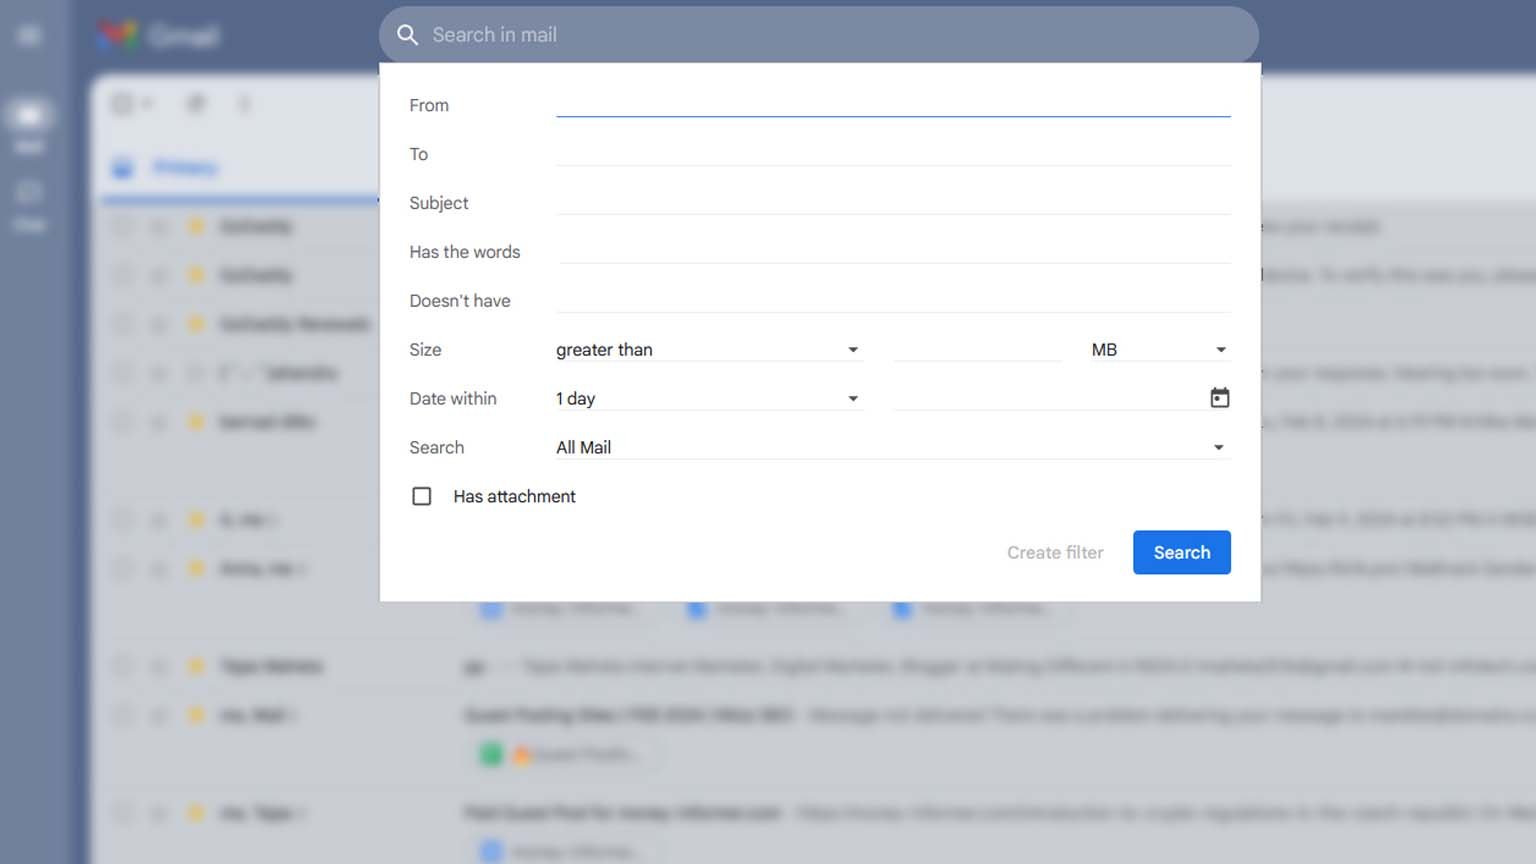
- In the subsequent dialog box, provide the search criteria and relevant keywords.
- To ensure that your filter works properly, click the Search button and go through the results.
- If you are satisfied with the search, go to the bottom of the search page and click on Create Filter.
- Once you click on Create Filter, you will have a choice to determine what the filter will do.
- Make your choices accordingly and click on Create Filter again.
An alternate way to create a filter
If you want the filter to work according to the substance of a particular email, here is how you can do it.

- Open the Gmail app or website.
- Look for a checkbox next to your desired email and click on it.
- Now click on the More icon. It is in the form of three vertical dots.
- In the drop menu, click on Filter Messages Like These.
- Provide additional filtration details and relevant keywords.
- Lastly, click on Create Filter.
Steps to editing an existing filter
Our needs and preferences change with the situation. Therefore, if you want to modify an existing filter, here is how you can do it.
- Open the Gmail app or website.
- Click on the Settings option.
- In the preliminary menu, click on More Settings.
- Find Filters and Blocked Addresses and click on them.
- Click on Edit to change the filter details according to new information.
- Next, click on the Continue button when editing.
- Lastly, click on the Update filter, and you are good to go.
How to export a filter
If you have spent sufficient time designing a filter that works best for you, you may want to export it so you can apply it to other searches too. Here is how you can export a filter.
- Open the Gmail app or website.
- Click on the Settings button.
- In the preliminary menu, click on More Settings.
- In the elaborated Settings menu, click on Filters and Blocked messages.
- Click on the checkbox next to the Filter button.
- At the bottom of the Settings menu, click on the Export button.
- Next, you will get a .xml file, which is editable on any text editor platform.
How to import a filter
Importing a filter from a friend can make your life easy. Here is how you can sneak in a filter to your searches.
- Open the Gmail app or website.
- Click on the Settings button.
- In the preliminary menu, click on More Settings.
- In the Settings menu, click on Filters and Blocked messages.
- Click the checkbox next to the Filters button.
- At the bottom of the page, click on Import.
- Choose a file and the filter that you want to import.
- Click on the Open file button.
- Lastly, click on the Create Filters button.
Recommended for you:
How to Block Emails in Gmail
Conclusion
Gmail filters are an efficient way to optimize your searches and save time. Follow these steps to edit and create your own filters.
Also, dry run your searches to see if the filter functions perfectly. Lastly, keep updating your filter details over time to maintain relevance.